Meet Ella the Elephant: Your Adorable Drawing Adventure Awaits!
Ready to create a little cuteness overload? Meet Ella the Elephant, a chubby, cheerful little friend who’s super fun to draw! With her round body, tiny tail, and playful trunk, Ella is the perfect character to bring to life when you need a quick and easy doodle.
Whether you’re just passing time or looking to add some charm to your sketches, drawing Ella will surely put a smile on your face. Let’s see how easy it is to bring this lovable elephant into your sketchbook!
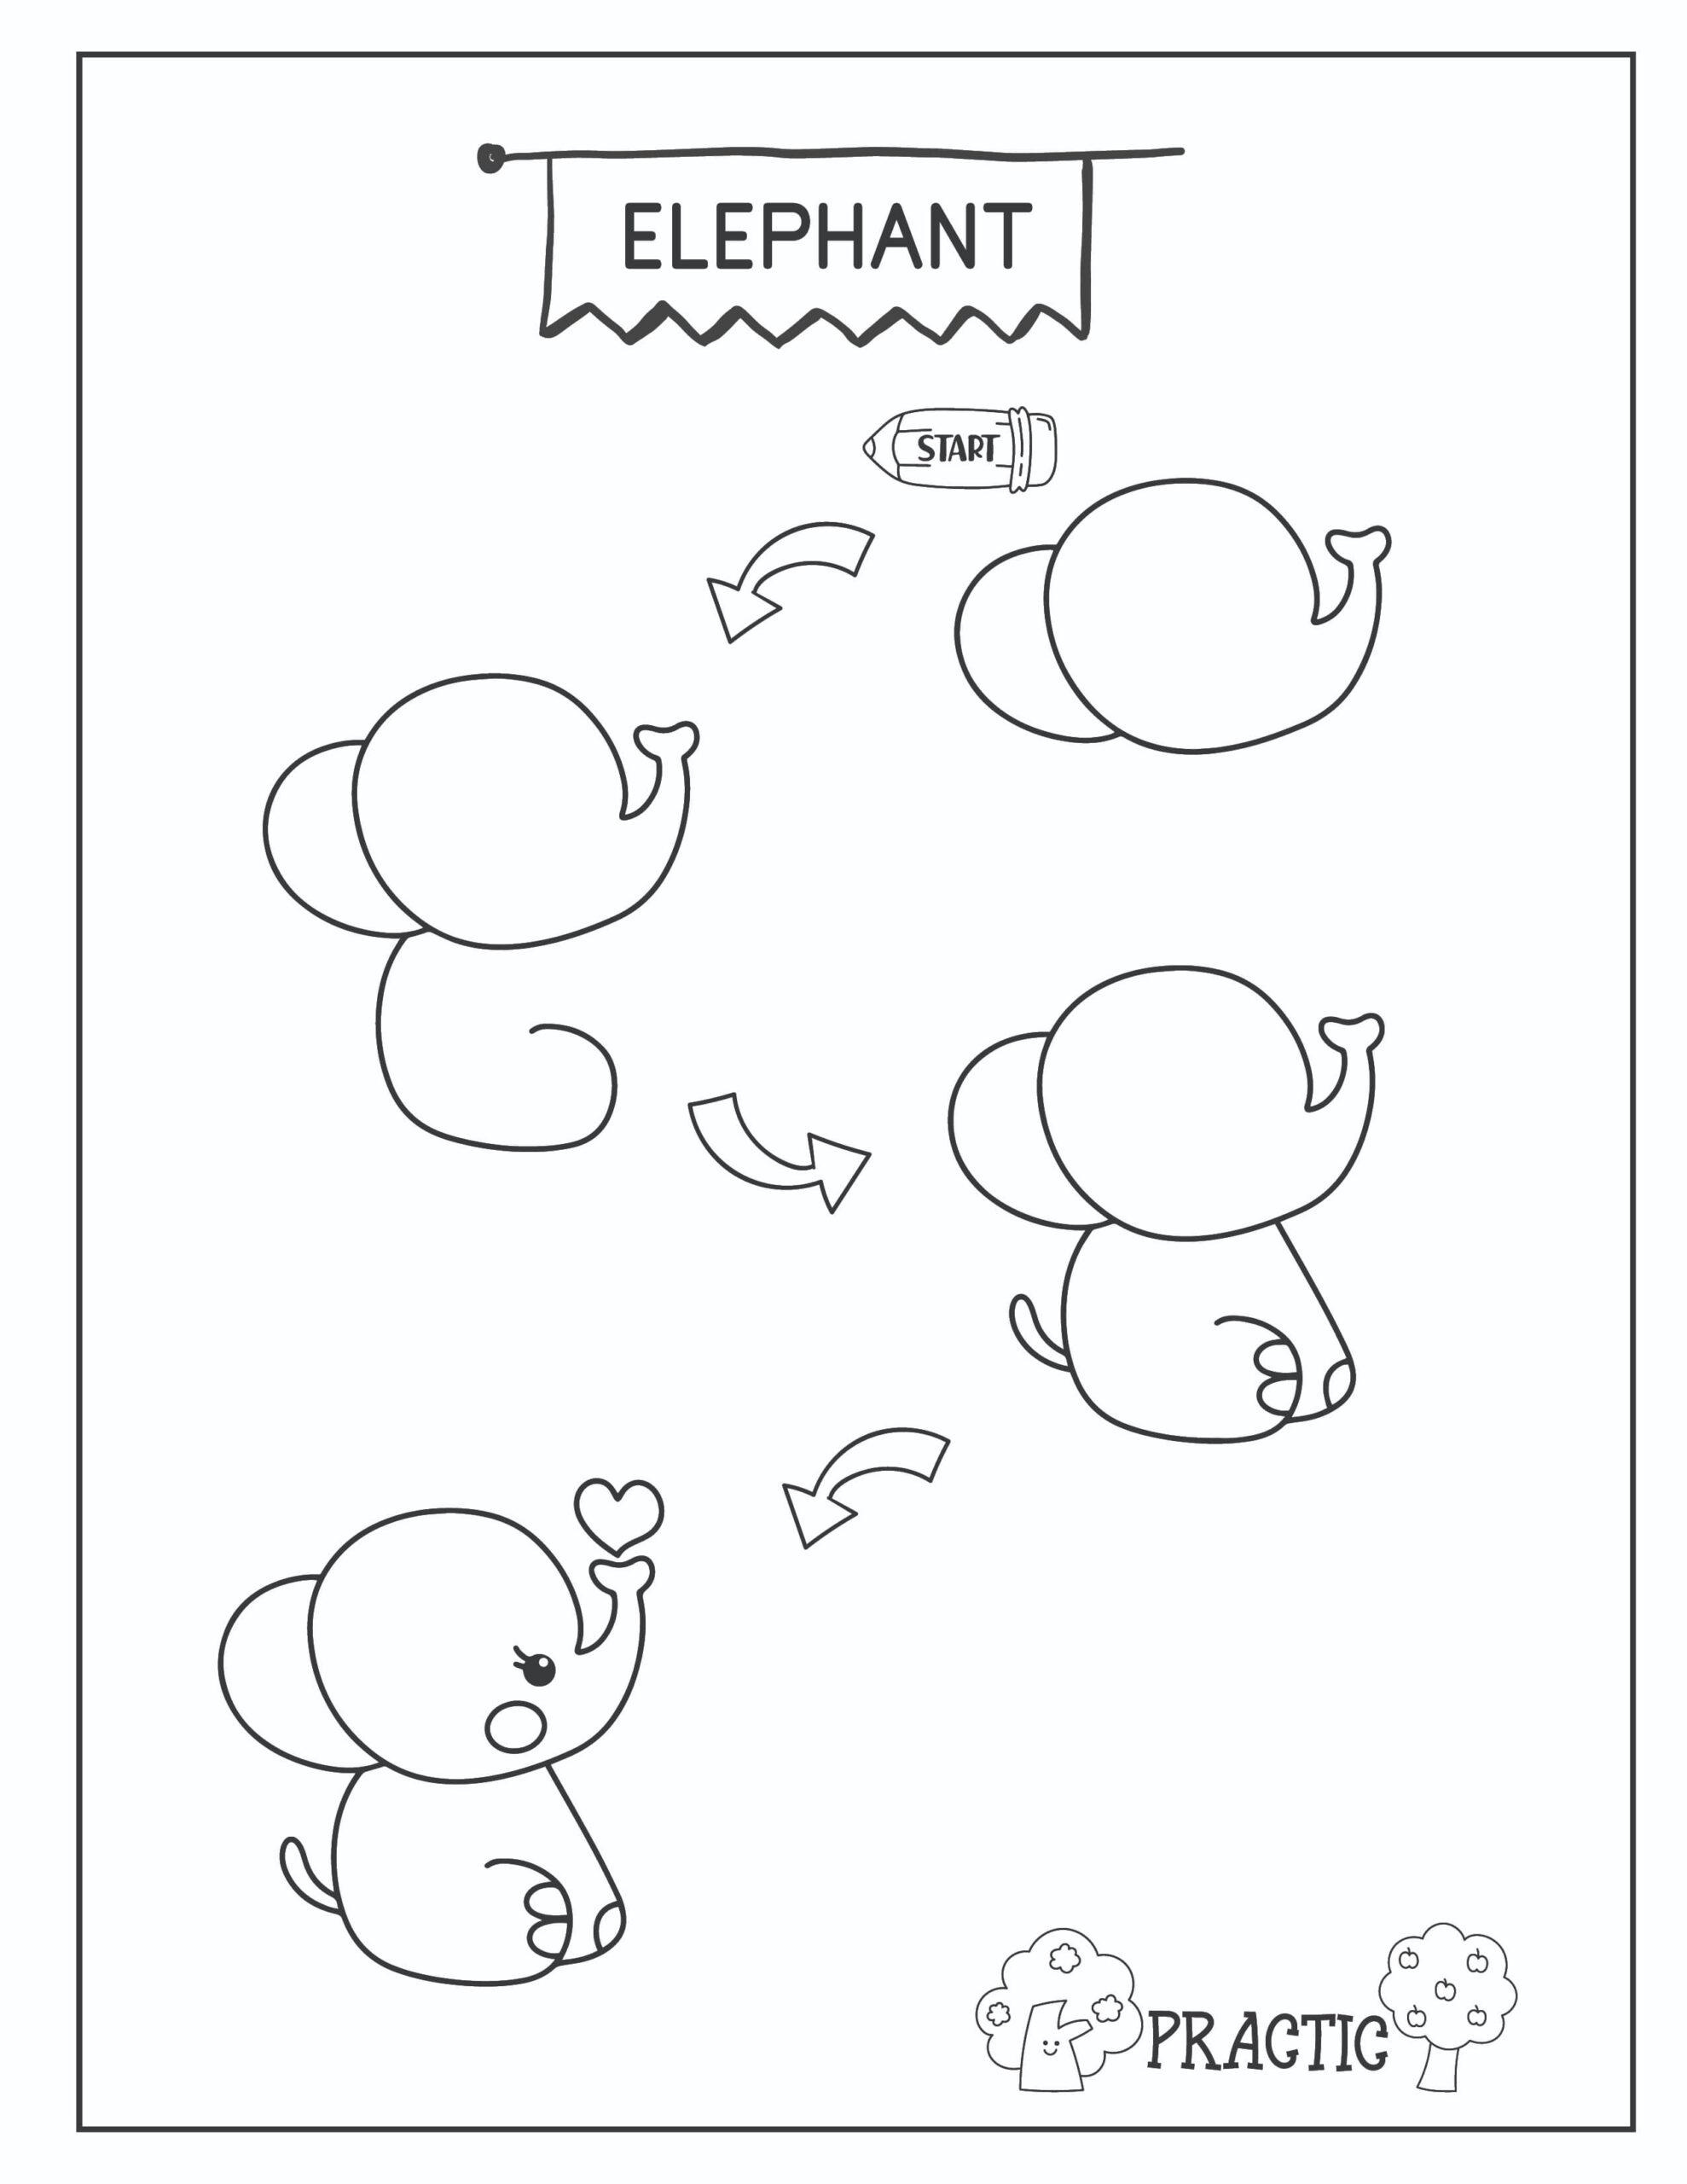
How to Draw Ella the Elephant in Four Simple Steps!
Drawing Ella the Elephant is a delightful way to pass the time, especially when you need something quick and fun to sketch. With her round, playful shape and charming details, Ella is easy to create with just a few steps. Let’s get started and see how quickly you can bring this adorable elephant to life!
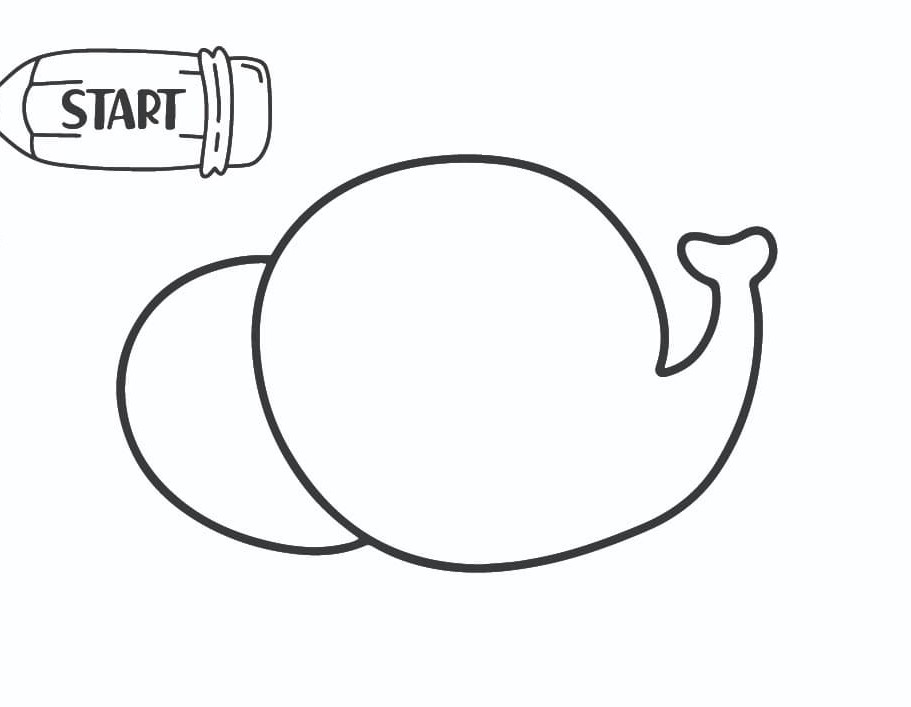
Step 1: Draw the Body and Head
Start with a large, round shape for Ella’s body. Think of it as a big, soft circle.
Add a smaller, slightly overlapping circle on the left side for Ella’s head.
On the right side of the head, sketch a curved line extending outward to form the base of Ella’s trunk
.Finish by adding a small, rounded bump at the end of the trunk.
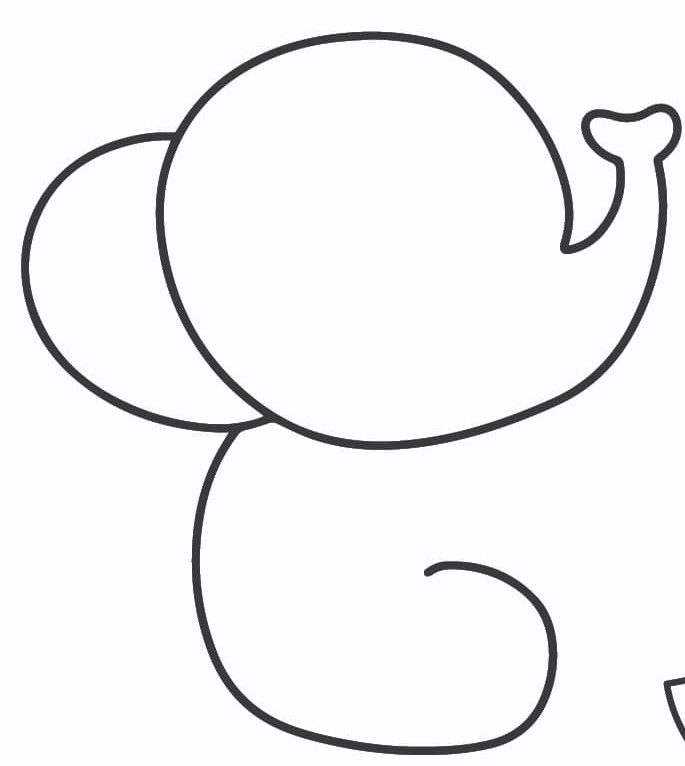
Step 2: Add the Ears and Legs
Draw a large, curved line on the left side of the head to form Ella’s big floppy ear.
Add another curved line on the right side for the other ear, but make it smaller since it’s partially hidden.
For the legs, sketch two small, rounded shapes at the bottom of the body, making sure they look like Ella is sitting.
Add a tiny, curved line at the back for her tail.
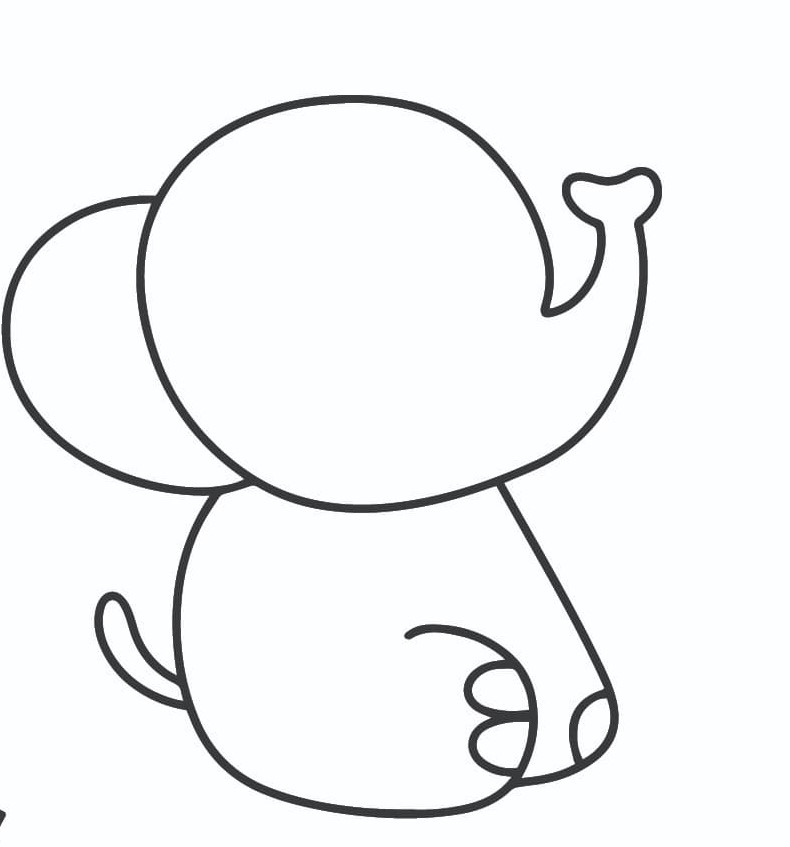
Step 3: Shape the Trunk and Add Details
Extend the trunk by drawing a smooth, curved line from the base of the trunk to its tip, giving it a nice, gentle curve.
Draw two small, rounded shapes at the bottom of the body for Ella’s back feet.
Add a little heart shape at the tip of Ella’s trunk to make her extra cute.
Draw two small ovals on her belly for a bit of detail.
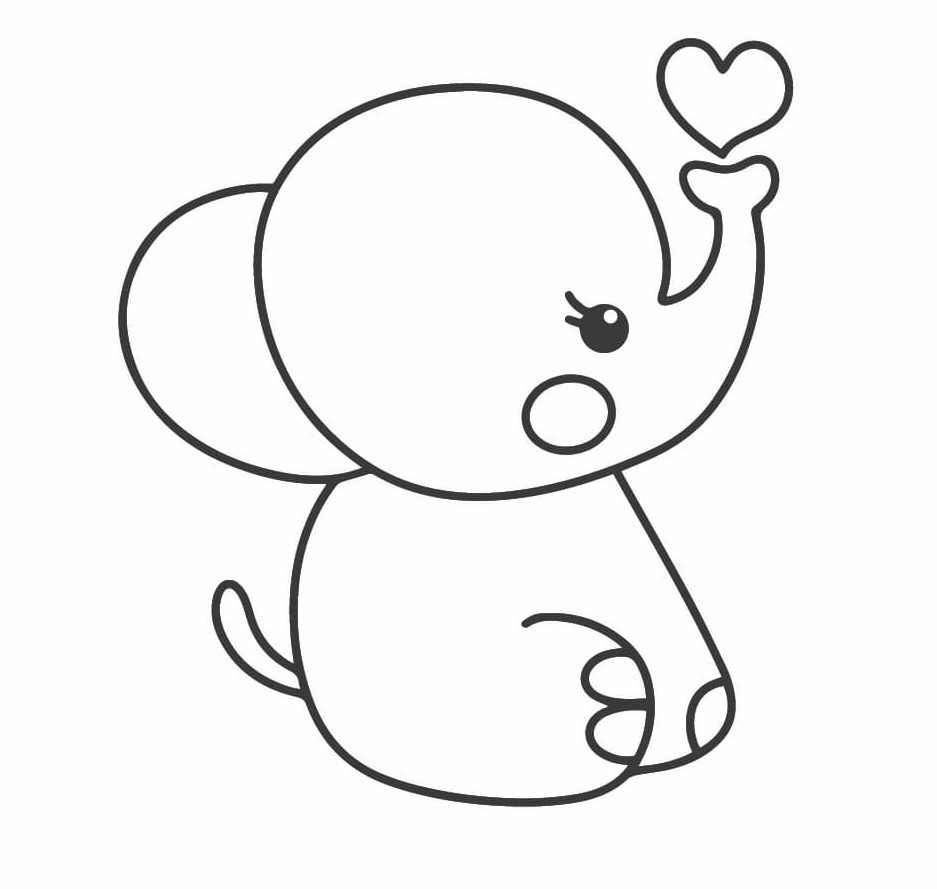
Step 4: Draw the Face and Final Touches
Draw two round eyes on Ella’s face, adding small circles inside for the pupils to make them look lively.
Add a small, curved line between the eyes for a cute, smiling mouth.
Draw tiny eyelashes above each eye to give Ella a sweet expression.
Finally, add any other details like a blush on her cheeks or little lines on her trunk to complete the look.
And there you have it—Ella the Elephant is ready to bring some charm and cheer to your sketchbook!
Drawing Tips to Make Ella the Elephant Even Easier
Start with Simple Shapes: Begin by sketching basic shapes like circles and ovals for Ella’s body and head. This helps you get the proportions right from the start and makes the drawing process smoother.
Keep Your Lines Light: When sketching Ella’s outline, use light pencil strokes. This way, if you need to make any adjustments, you can easily erase and refine without leaving heavy marks on the paper.
Focus on Symmetry: For Ella’s ears and legs, try to keep them as symmetrical as possible. You can draw light guidelines to help position them evenly on both sides of her body.
Draw the Face Last: Save the face for last, once you’re happy with the overall shape. This way, you can ensure the eyes, mouth, and other details are perfectly placed, giving Ella her adorable expression.
Add Personality with Small Details: Don’t be afraid to add your own personal touches, like a little blush on Ella’s cheeks or tiny lines on her trunk. These small details can really bring your drawing to life and make Ella even more unique!
By following these tips, drawing Ella the Elephant will be even more enjoyable and straightforward. Take your time, have fun, and let your creativity shine!
Expressing Ella: Adding Personality with Fun Expressions
Now that you’ve got the basics of drawing Ella, it’s time to bring her personality to life with different expressions! Changing Ella’s expression can make your drawings more dynamic and fun. Let’s explore three adorable expressions you can try out to show different sides of Ella’s character.
Joyful Ella
Ella is feeling extra happy and excited!
Eyes: Draw two large, round eyes with small, dark pupils positioned toward the upper corners to give them a bright, cheerful look.
Mouth: Add a big, curved smile below the eyes. You can even draw a tiny open mouth by adding a small “U” shape under the smile to show that Ella is laughing.
Eyebrows: Optional, but you can add small, curved lines above each eye to emphasize her joyful expression.
Curious Ella
Ella is intrigued and exploring something new.
Eyes: Draw the eyes slightly larger and rounder than usual, with the pupils placed towards the center to show curiosity.
Mouth: Create a small, rounded “O” shape for the mouth, as if Ella is saying “Oh!” in surprise.
Eyebrows: Add small, slightly raised eyebrows close to the eyes to enhance the curious look.
Sleepy Ella
Ella is ready for a nap after a long day.
Eyes: Draw two half-circle shapes, or “U” shapes, with the open side facing down to represent closed or drowsy eyes. Position them lower on the face.
Mouth: Add a tiny, soft smile or even a flat line for the mouth to show that Ella is relaxed and content.
Eyebrows: Draw the eyebrows as short, slightly slanted lines above the eyes to emphasize her sleepy state.
These expressions are a great way to explore Ella’s different moods and give your drawings a unique flair. Experiment with these looks to see how each one changes the feel of your Ella doodle!
Avoiding Common Mistakes: Keep Ella Looking Adorable
Even simple drawings can have their tricky spots, and Ella the Elephant is no exception. To help you avoid any pitfalls, let’s take a look at two common mistakes that can happen when drawing Ella and how you can easily fix them to keep her looking just right.
Mistake 1: Misaligned Ears
A common mistake is drawing Ella’s ears unevenly or misaligned, which can make her look lopsided or out of balance.
How to Fix It: Start by lightly sketching guidelines for Ella’s ears before finalizing them. The ears should be symmetrical, with one on each side of her head at the same height. If one ear looks higher or larger than the other, adjust it by comparing it to the opposite ear. Symmetry will help maintain Ella’s cute and balanced appearance.
Mistake 2: Overcrowded Facial Features
Another mistake is placing Ella’s eyes, mouth, and other facial features too close together, which can make her face look cramped and less expressive.
How to Fix It: To avoid overcrowding, start by lightly sketching where you want each feature to go, leaving enough space between the eyes, mouth, and cheeks. If the features seem too close, don’t hesitate to erase and reposition them until they look well-spaced and balanced. A well-proportioned face will make Ella’s expression clear and more appealing.
By keeping an eye out for these common mistakes and knowing how to correct them, you’ll be able to draw Ella the Elephant with confidence, ensuring she looks as adorable as ever in every doodle!
Coloring Ella: Techniques to Bring Your Elephant to Life
Now that you’ve sketched out Ella the Elephant, it’s time to add some color and make her truly pop! Whether you’re using colored pencils, markers, or digital tools, each technique can give Ella a unique and vibrant look. Let’s explore how to use these different methods to bring out the best in your drawing.
Colored Pencils
Colored pencils are perfect for creating soft, blended colors that give Ella a gentle, textured appearance.
Start with Light Layers: Begin by lightly coloring Ella’s body with a soft gray or light blue. Use light, even strokes to cover the entire area without pressing too hard.
Build Up the Color: Gradually add layers of color, focusing on shading around the edges of Ella’s body, under her ears, and along her trunk. This will create a sense of depth and dimension. You can mix in a slightly darker shade to emphasize the shadows.
Blend for Smoothness: Use a blending pencil or a white pencil to gently blend the colors together, creating a smooth gradient. Add a few highlights with a white pencil on areas like the top of her head and trunk to make her look shiny and soft.
Markers
Markers give you bold, vibrant colors that make Ella stand out with a smooth, even finish.
Solid Base Color: Start by using a light gray or soft blue marker to fill in Ella’s body. Markers provide even coverage, so apply the color in smooth, controlled strokes to avoid streaks.
Layer for Shadows: Use a slightly darker shade of your base color to add shadows under Ella’s ears, along the bottom of her body, and on the inside of her trunk. You can build up the color by going over the same area twice to create more depth.
Fine Details: Use a fine-tipped marker to outline Ella’s features and add small details, such as the inner parts of her ears or tiny lines on her trunk. Be careful with details, as markers are very bold and can easily overpower the drawing if overdone.
Digital Coloring
Digital tools offer precision and versatility, allowing you to create a polished, professional look for Ella.
Layering for Depth: Start by filling in Ella’s body with a base color using a digital brush. Then, create additional layers for shadows and highlights. Digital tools make it easy to adjust the opacity and softness of your brushes, so you can achieve smooth, realistic shading.
Experiment with Colors: One of the great things about digital coloring is the ability to try different color schemes. You can experiment with various shades of gray, blue, or even pastel colors to see what suits Ella best.
Add Special Effects: Take advantage of digital effects like gradients, textures, or glows. For instance, you could add a subtle gradient to Ella’s body to give her a soft, plush appearance or use a texture brush to create the look of fur or skin.
By exploring these coloring techniques, you can bring Ella the Elephant to life in your own unique style. Whether you prefer the soft textures of colored pencils, the bold vibrancy of markers, or the precision of digital tools, your Ella will shine with personality and charm!
